
I will never forget the first time I had to grab the towel bar to get off the toilet. It was two winters ago, not long after my slip in the tub, and I remember thinking, this is how it starts. You make a joke about it to your daughter, you call it silly, and then one morning you catch yourself bracing one hand on the sink and one on the wall, holding your breath, wondering if your knees are going to cooperate today. Nothing bad happened that morning. I got up fine, eventually. But the moment stuck with me the way a warning light does, and I knew I did not want to find out what the next version of that moment looked like.
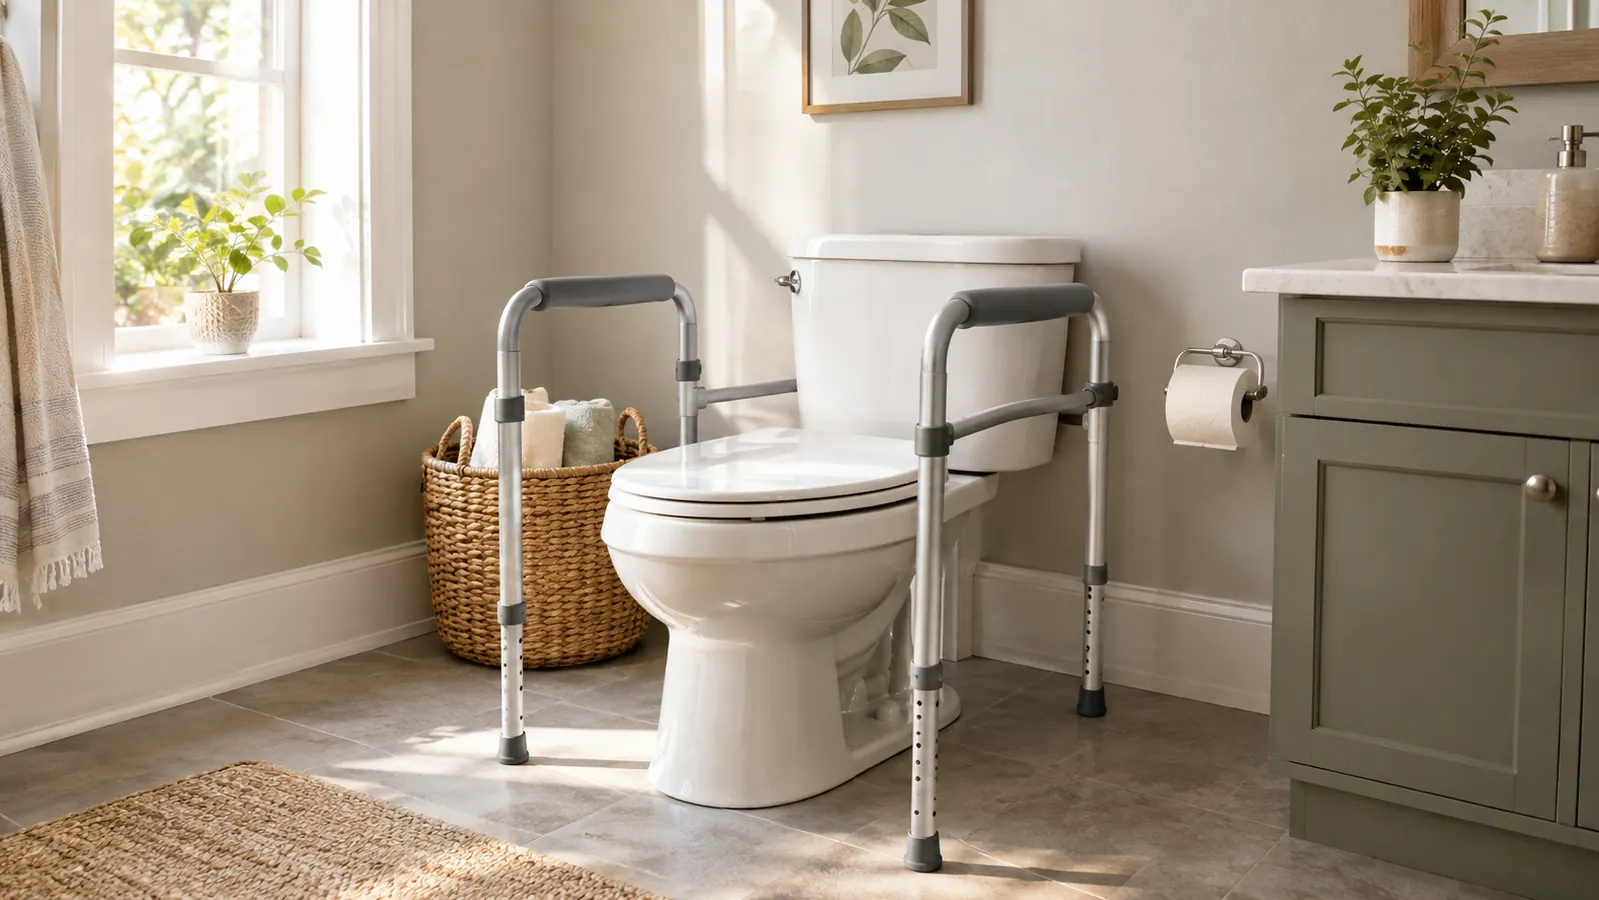
So that same week I ordered the Vive toilet safety rail. It arrived in two days, I carried it upstairs myself, and inside of a month I stopped thinking about it, which is exactly what you want from a piece of safety gear. It fits around the toilet without tools or holes in the tile, it took me maybe ten minutes to set the height, and my daughter Kate stopped eyeing it like a white flag. She came for a visit the week after I installed it, watched me sit and stand without a single grab for the sink, and said that one stays. This guide walks through how I actually use mine, step by step, because a rail only helps when you use it the right way.
A steady handhold when your knees need a minute
The Vive toilet safety rail gives you two solid grips at the right height, right where you need them, and it fits around most standard toilets. Check today's price on Amazon.
Amazon Check Today's Price on Amazon →Step 1: Set the height before you need it
The rail only does its job if the handholds are at the right height, so get this right before anything else. With the frame standing around the toilet, adjust each side so the grips come up to about the top of your thigh when you are standing beside it. You want a slight bend in your elbow when you push down, not a straight-arm reach and not a crouch. Too low and you will be bending your back to use it. Too high and you will be reaching up and pulling sideways instead of pushing down.
Most rails like this one, including the Vive, adjust with push pins that let you move each leg in small increments. Set the two sides to the same height, then give the whole frame a gentle rock from side to side. The rubber feet should sit flat on the floor and the frame should not wobble. If it rocks, move one side a notch and try again. Fifteen minutes of fiddling now saves you a lot of awkward moments later, and it is a job that is much easier to do standing up fresh than it is on a bad morning.
Recheck it every couple of weeks. The rubber feet hold well on clean tile, but a bath mat or a stray sock can let the frame slide, and a spray cleaner can leave the floor slick. I give the frame a small nudge with my foot before I sit down, almost without thinking about it. It takes three seconds and it keeps me honest.
Step 2: Use the rail to sit down, not just to stand up
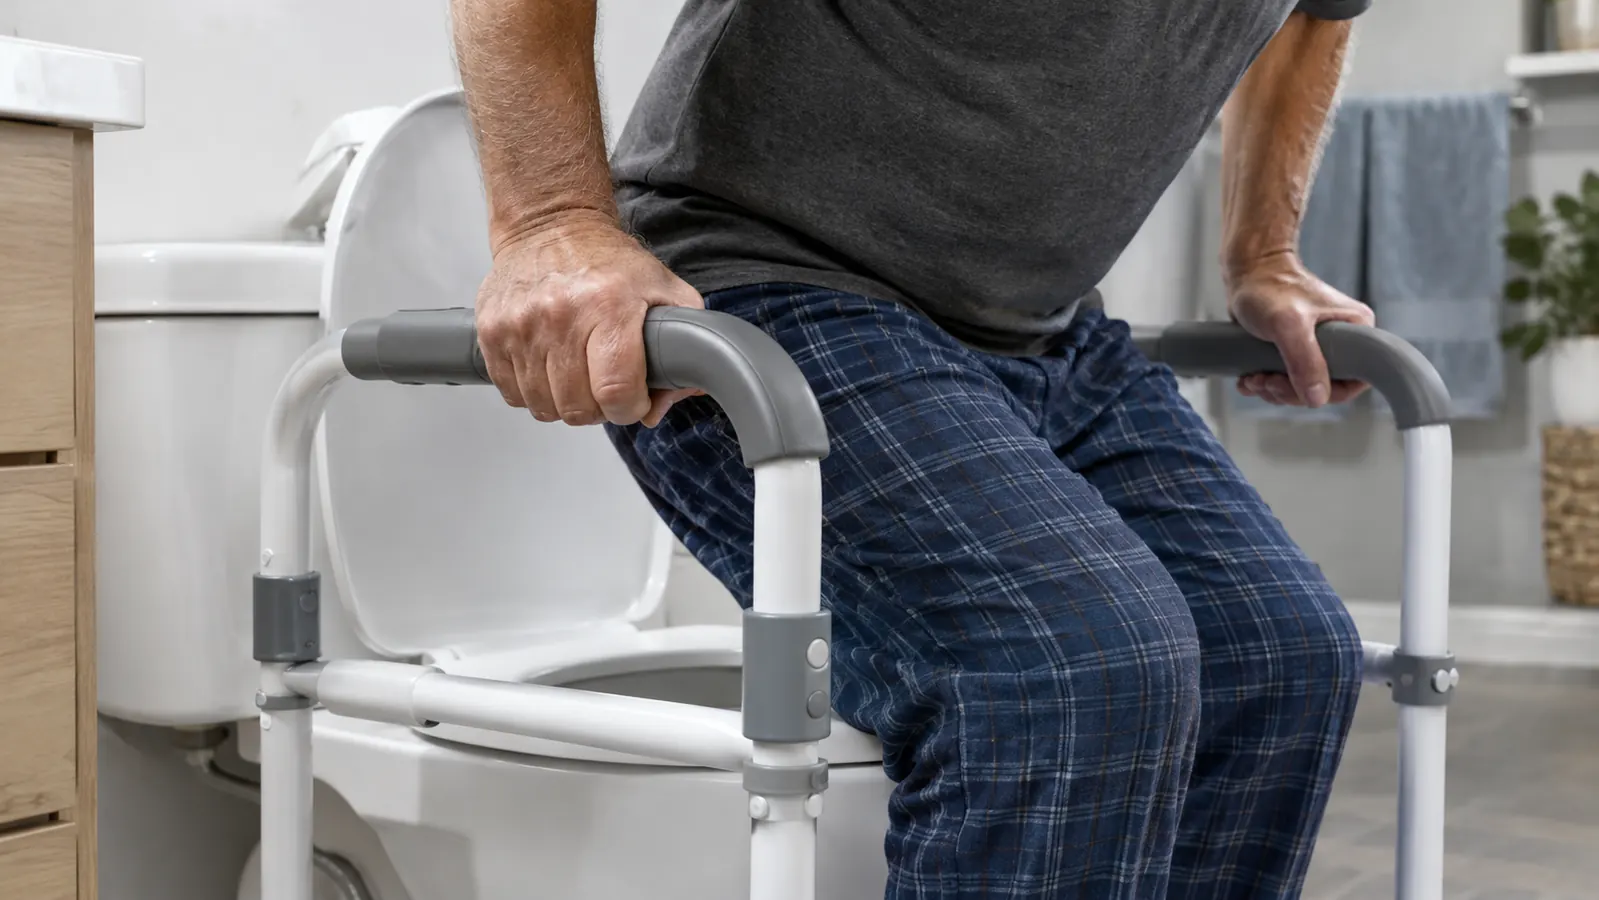
Most people think of a safety rail as something you grab on the way up, but half the job happens on the way down. Lowering yourself is where knees complain the loudest, and a slow, controlled sit is easier on them. So I turn around with my back to the toilet, reach back, and take hold of both sides of the frame before I start to bend. Even on good days I do this, because the habit is the entire point. You do not want your first reach for the rail to happen on the day you actually need it.
Keep your hands on the frame and lower yourself slowly, letting your arms take some of the weight instead of dropping the last few inches onto the seat. That controlled descent is kinder to your knees, and it means you are already holding the rail when you are seated, which is exactly where you want your hands to be. It also keeps your back straighter through the sit, which is easier on the spine. Trying to grab the rail after you are down means leaning sideways, and leaning sideways on a toilet is a good way to end up on the floor.
Nobody is looking for perfect form here. The goal is a sit you can manage smoothly every single time, at 2 a.m. and on the days when everything hurts. If sitting down has turned into a controlled fall, or you catch the edge of the seat more than you would like, bring it up with a physical therapist. The rail should be supporting you, not rescuing you.
Step 3: Plant your feet and scoot forward
Once you are seated, take one breath before you push up. Come forward until your feet are flat on the floor, about shoulder-width apart, toes pointing straight ahead. Most toilets are a little high for a comfortable stand, so you will usually need to slide to the front edge of the seat until your feet feel solid and your weight is sitting over them. It sounds like a small thing, but it is the difference between standing up and launching yourself. Take the extra second. It is the cheapest improvement in this whole article.
This is the part everyone rushes, and I say this from experience. They push up from the middle of the seat with their feet tucked back underneath them, and the first thing that happens is they rock forward and grab the rail to catch themselves. It works, but it is a lot harder than it needs to be, and it is hard on the lower back. Get your feet underneath you first, and the stand becomes mostly leg work. Your arms steady you; they should not haul you.
If your feet do not quite reach the floor, or scooting forward bothers your knees, a low footrest set in front of the toilet can help more than you would expect. It is a small purchase and it pairs well with a rail. I will get to the rest of my bathroom setup in the What Else Helps section below.
Step 4: Lean forward and push through your feet
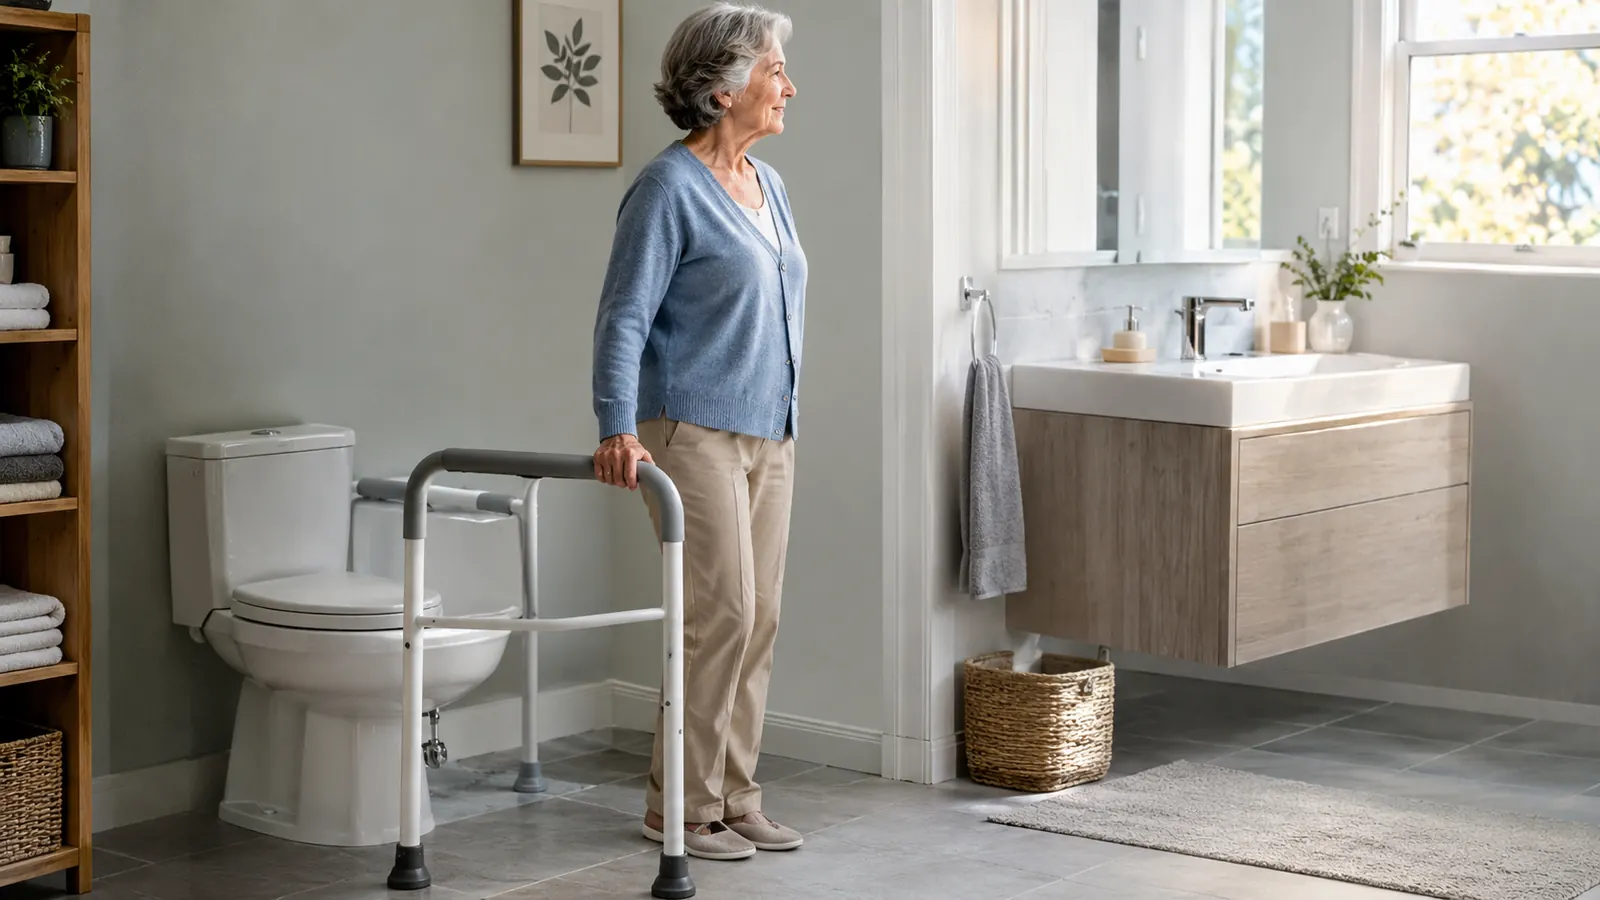
Now for the actual stand. Lean your chest forward so your nose ends up over your toes. That one movement puts your weight over your feet, which is most of the battle. Then push through your feet, straightening your legs, and let the rail steady the motion rather than do the pulling. Think of it as standing up with your hands resting on a kitchen counter, not heaving yourself out of a swimming pool.
When your feet are underneath you, you will find your arms barely need to work. If you are pulling hard on the rail, your feet are probably too far back. Reset, scoot forward, and try again instead of muscling through it. There is no shame in using the rail for real support; that is what it is built for. But a smooth, even stand is easier on your knees and your lower back than a heave, and it is steadier, which matters more. Nobody is grading you. The only test is whether you get up smoothly, and a smooth stand is a safe stand.
If your balance feels unsteady even when you take it slow, or you have had a recent fall, this is the moment to check in with your doctor or an occupational therapist. A rail is a wonderful tool, but it is not a substitute for a professional opinion about what is going on. You are better off asking and hearing that everything is fine than staying quiet and hoping.
Step 5: Stand tall, pause, and only then turn
Stand all the way up, then pause. This is the moment nearly everyone skips, and it is the one I would most want you to take away from this article. People pop up, pivot toward the sink in the same motion, and that is when the rail is already behind them and their weight is still shifting. Get steady first. Both feet flat, knees soft, hands still resting on the frame until you feel balanced. If the room seems to do a slow spin, that is not the moment to walk anywhere; that is the moment to sit back down.
Once you feel solid, take your hands off one at a time and turn carefully to face the sink, the walker, or the door. If you feel at all unsteady, keep one hand on the rail until you are sure. There is no rule that says you have to let go the second you are upright. I keep a hand on it until my feet have found the bath mat, and on rough mornings that takes a few extra seconds. Nobody is timing you.
And if standing up has gotten harder than it used to be, or you find yourself reaching for the rail on days you never needed it before, tell your doctor. A change in how easily you get up can be a useful early signal, and catching it early is the whole game. The rail will keep you safe in the meantime, which is exactly what it is for.
What Else Helps
The rail does the main job, but a few small additions make the whole bathroom safer, and together they are what let me stay in this house comfortably. A non-slip bath mat with a rubber backing gives your feet a stable place to land, which helps every part of the stand, turn, walk sequence. A night light in the bathroom and the hallway means you are not navigating the dark on a late-night trip, and good lighting matters more than most people credit. I added a dim lamp on a small table by the bathroom door instead of a bright overhead light that blinds you at 2 a.m., and it was one of the best small decisions I made.
If you are choosing a rail for someone else, or you are not sure the compact Vive frame is right for your bathroom, it is worth seeing how it stacks up against a full safety frame before you spend. Some bathrooms suit a wider base, and some bodies want the extra room a full frame offers. I have written a longer head to head for anyone caught between the two, and the short version is that both are good tools, for different rooms. And if you are still asking whether a rail is worth it at all, the short answer from my house is yes. I have also listed the ten reasons I would not give mine back, for the days when you need convincing.
One more thing I learned the slow way: strength work makes the rail work less. My twice-weekly gentle strength class at the senior center has done as much for my confidence in the bathroom as any piece of equipment I own. The two go together. The rail keeps you safe while you get stronger, and getting stronger means you need the rail a little less. That is the best kind of progress.
Most of the technique is in the feet, not the arms. Get your feet underneath you, and the rail mostly steadies you.
A little help going from sitting to standing
The Vive toilet safety rail helped me stay independent in the house I love, and it can do the same for you. Check today's price on Amazon.
Amazon Check Today's Price on Amazon →